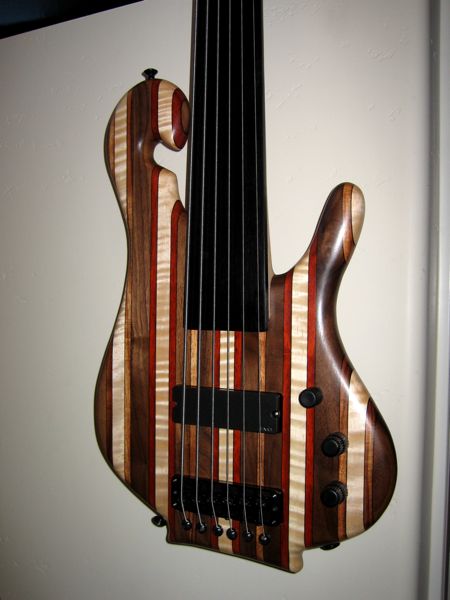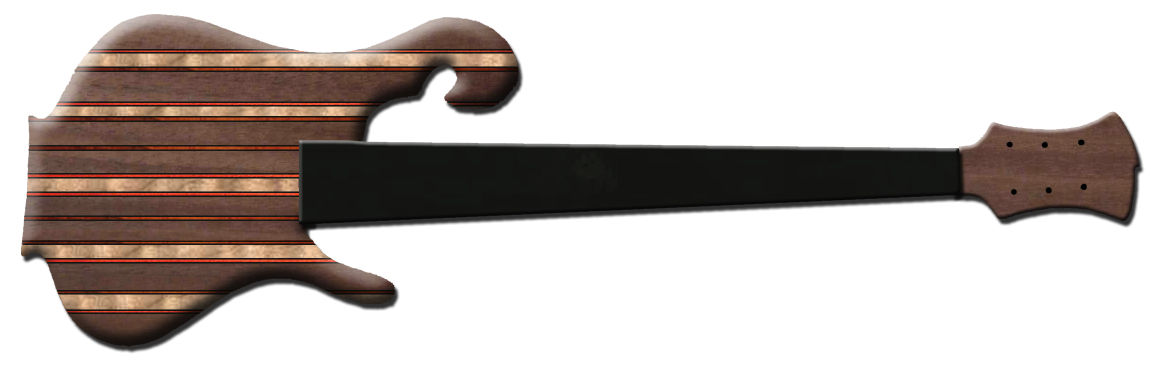
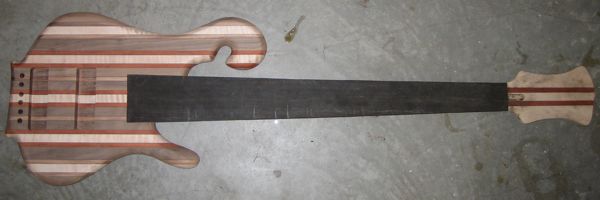
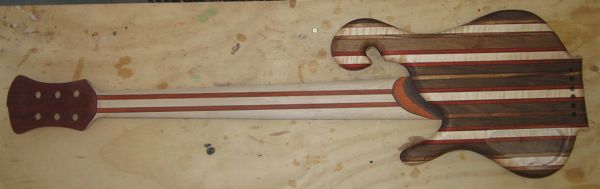
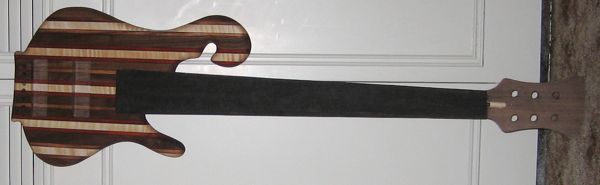
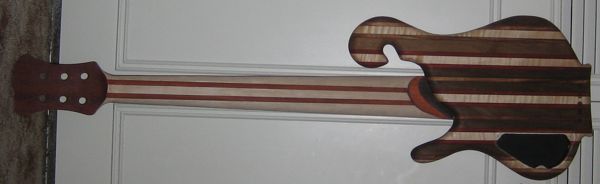
6 String
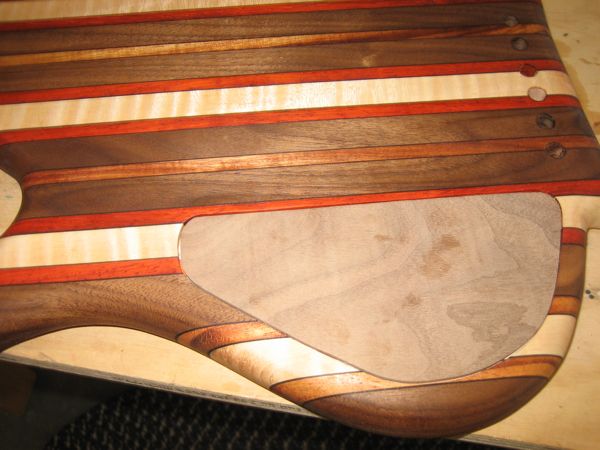
Black Walnut/Padauk/Curly Maple/Koa/Ebony Body
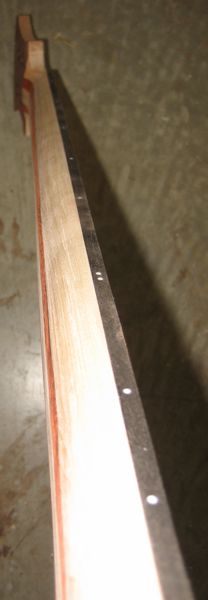
Ebony Fretboard
Maple Neck with Padauk “stringers”
Walnut Headstock Cover
Set-neck construction
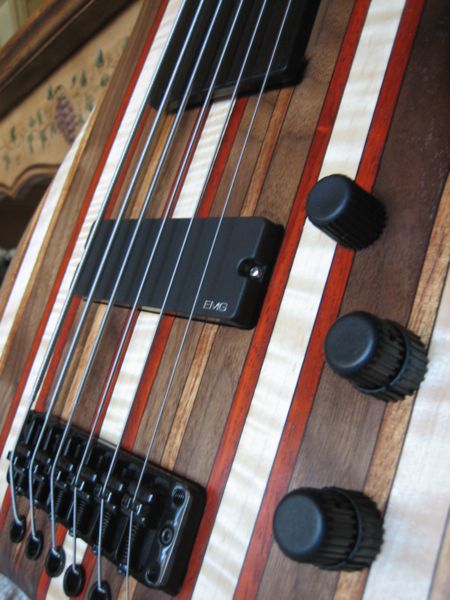
Warwick Bridge and Nut
EMG Pickup and Electronics
Hipshot Tuners
All black hardware
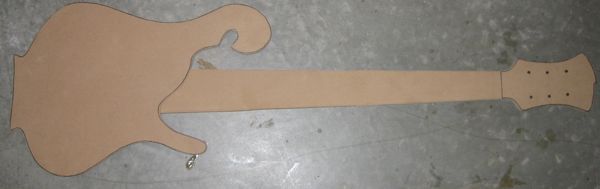
June 21, 2008
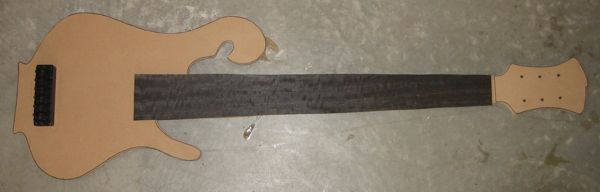
I started work on the full size design today on MDF including drawing and cutting.

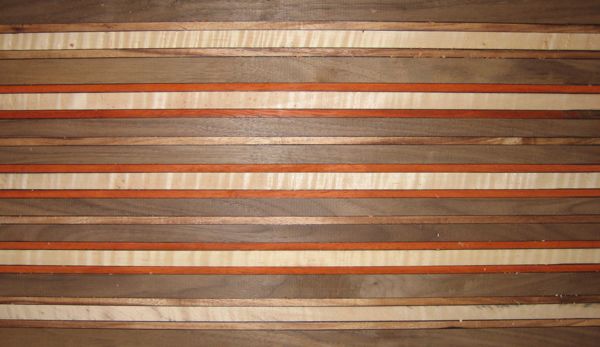
June 27, 2008
Busy, busy day! I cut out all the walnut, koa, padauk, maple and ebony. It was a lot more work than I expected. 43 different pieces so far. I haven’t glued anything up yet. I also very rough cut out the fretboard.
July 16, 2008
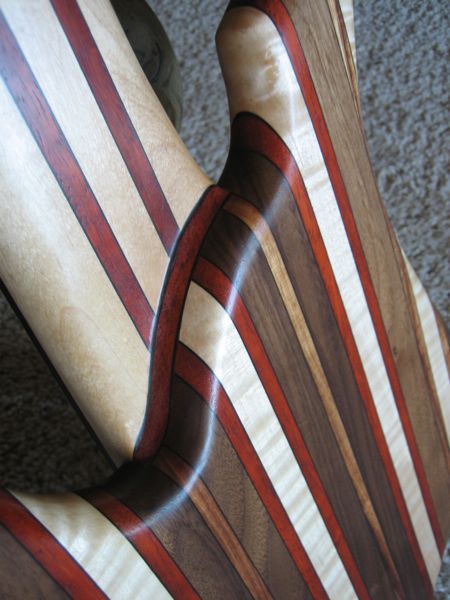
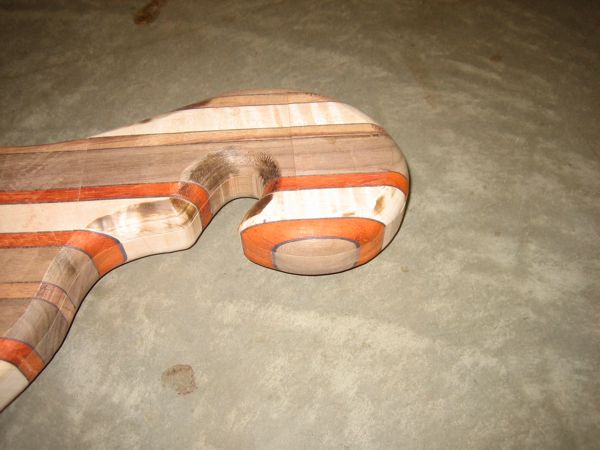
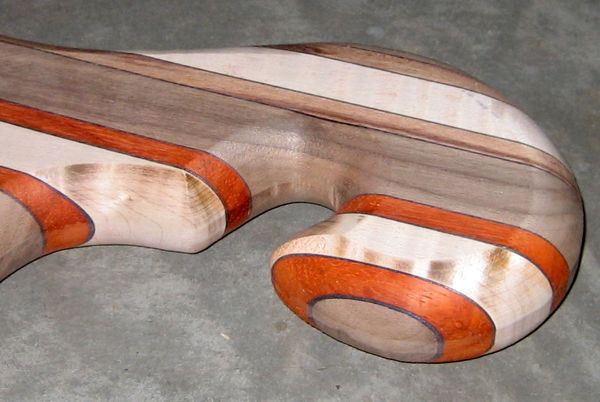
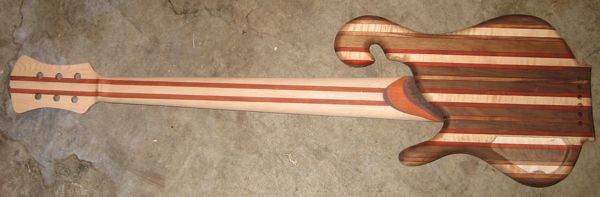
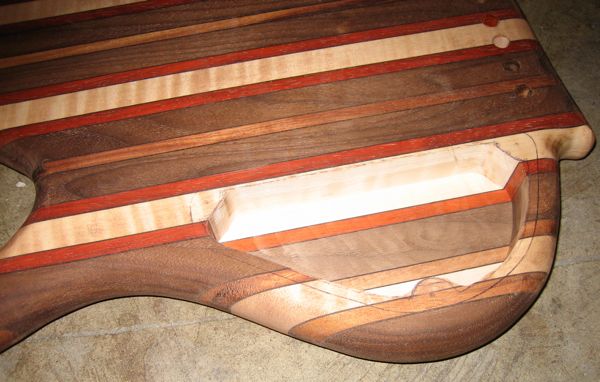
After a few days gluing the body together I finally had them all as one. The body blank was too wide for my planer sadly, so I had to do it all by hand… 4 hours later I had a piece of wood that was pretty much flat on both sides. I couldn’t make it completely flat and smooth since I didn’t have my belt sander. I started cutting out the body and rounding the edges. As you can see it got burnt a little bit from the router, but that is easily fixable. Besides some minor sanding, I am very pleased that I cranked out this body all today. I like the closeup picture of the upper horn how the different layers come together. On top of that, there wasn’t a single glue line in the entire body. It is perfect. I will never do it again since it was such a pain, but I am happy with the results. Ok, ok on to the pictures.

July 20, 2008
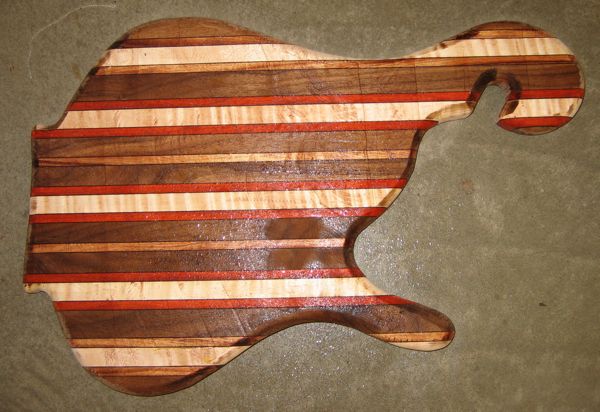
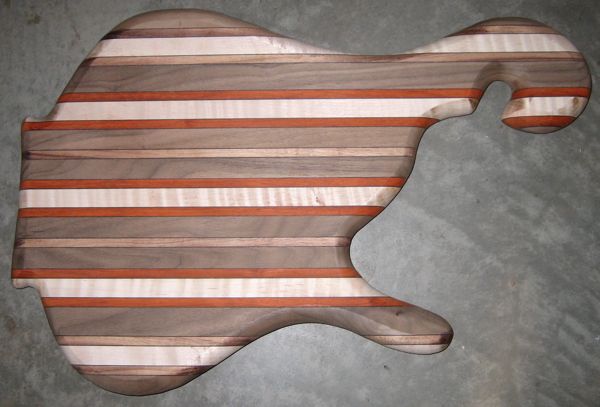
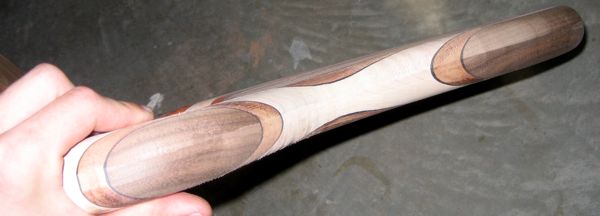
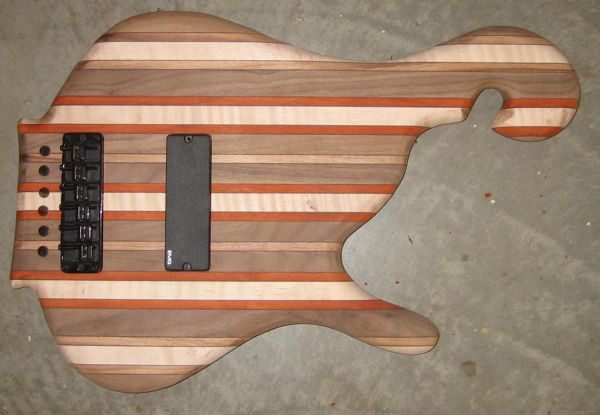
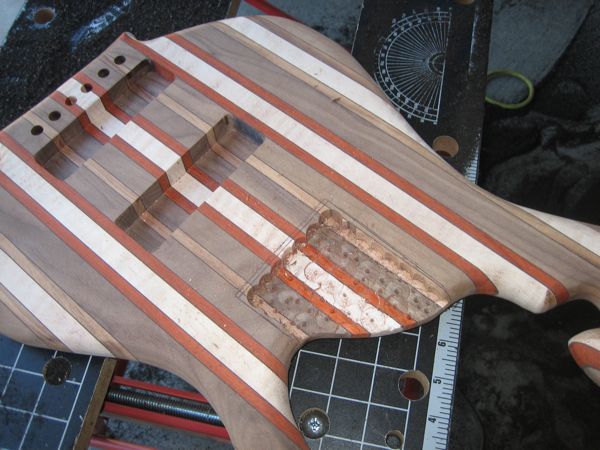
I was able to sand the body down to exactly 1-3/8″ thick and then rounded over the edges completely. It still needs quite a bit of sanding, but now I can start on the pickup, bridge, neck and control cavity placement.
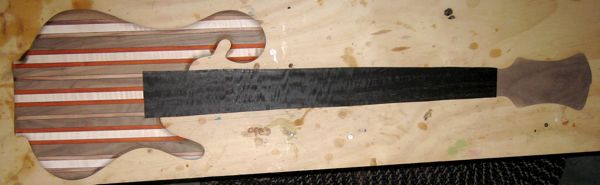
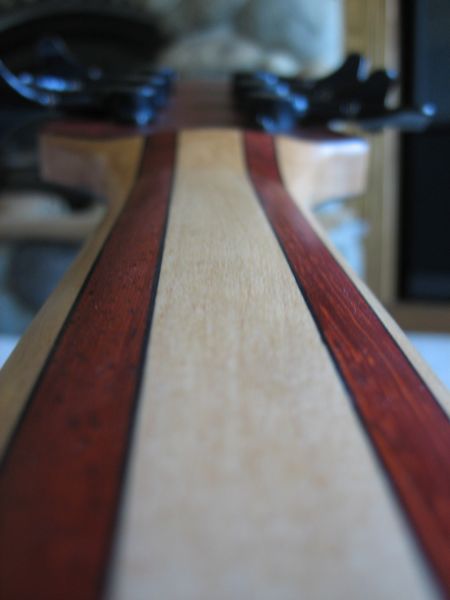
I think I am going to go with a maple neck with padauk stringers and the thin ebony stripes between them. Also, most likely a padauk “tranny block” between the neck and body.
July 23, 2008
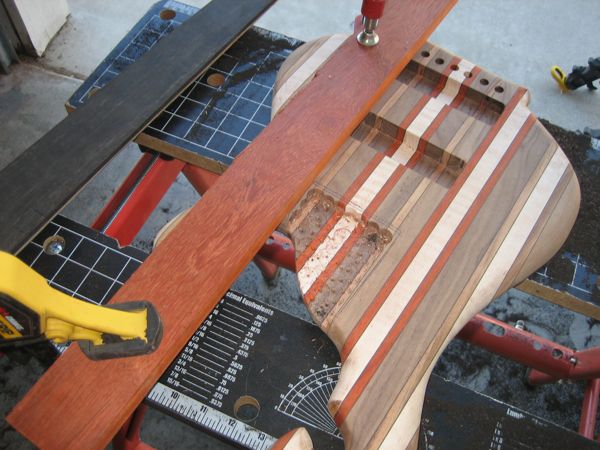
Well today I routed out the spots for the bridge and pickup. Yesterday I ordered all the electronics, string ferrules, straplocks and truss rod. I also glued up the neck and it is drying right now. I ended up going with a maple/padauk/maple/padauk/maple laminate with black veneers between the layers. I forgot to take a picture of it before I left my shop though.
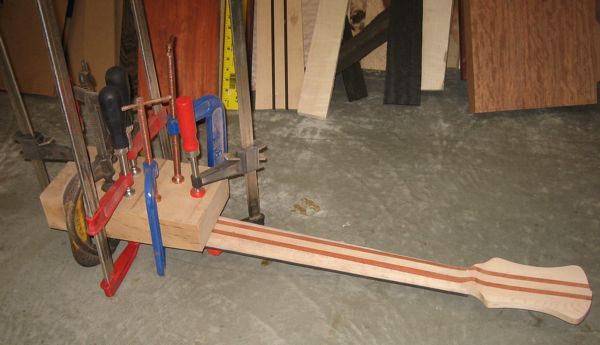
July 30, 2008
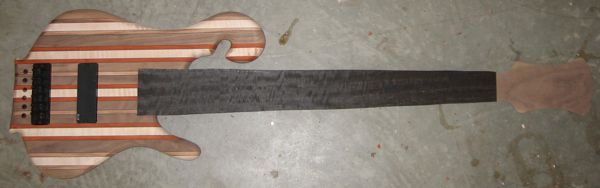
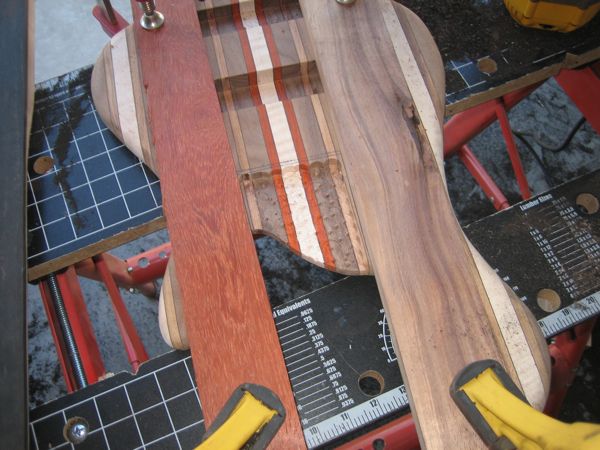
Today was yet another productive day in the shop. My neck blank was all dry and I could start getting it ready to become a neck. I ran it over the jointer and then into the planer. Then I started cutting out the neck shape for the back, sides and headstock angle. I also made the channel for the truss rod and glued on the fretboard.
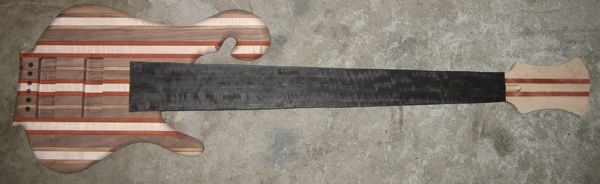
Next I will trim the fretboard to the final size and start shaping the back of the neck. I will also make the neck pocket very soon.
August 5, 2008
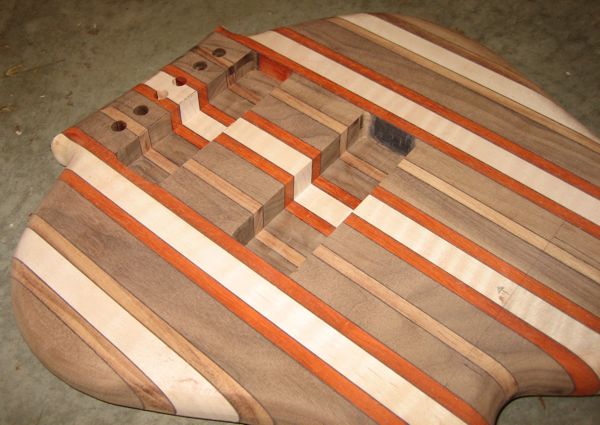
It was a short day in the shop. There just wasn’t much I could do while parts were gluing/drying. I was able to make the neck pocket and glue on the padauk tranny block on the neck. Here is how I make my neck pocket for those of you who were wondering.
I start by taking the bulk of the wood away with the drill press so it doesn’t kill my router bits.
Then I clamp on a guide for one of the sides of the neck pocket.
Then while keeping the first guide in, I put the neck in place and pinch it with the other sides guide to get a tight fit.
Lastly, I do the back to make it straight.
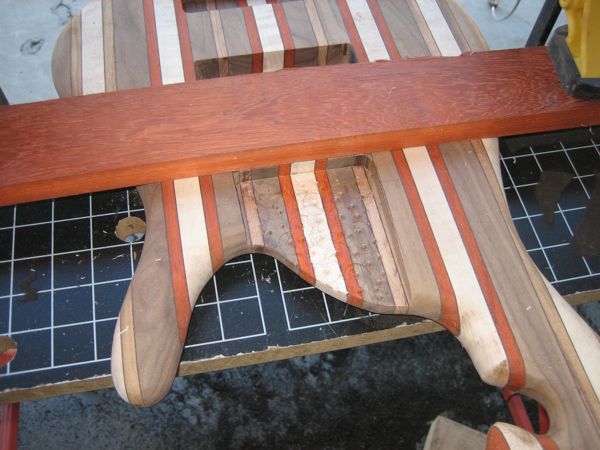
Then you are left with this:

With it all put together:
You obviously can’t tell, but here is the neck being glued up with the ebony/padauk/ebony tranny block.
One just to see how things are fitting…
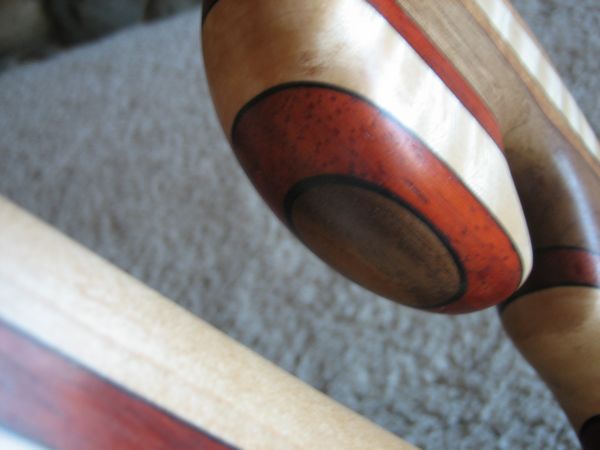
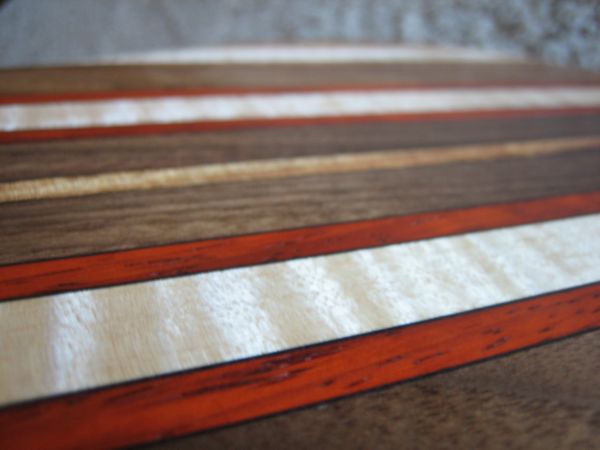
August 6, 2008
Here is a little update on what the woods will look like with an oil finish:
I started on the tranny block, still needs some work though:
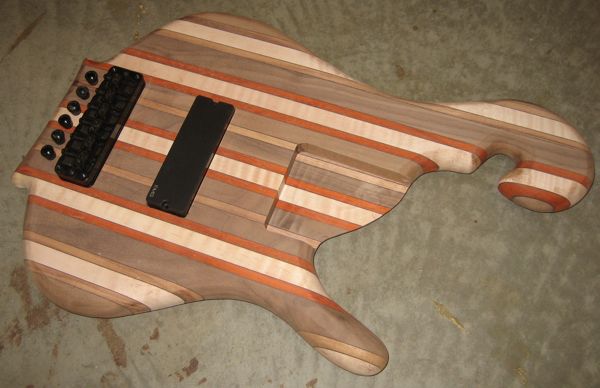
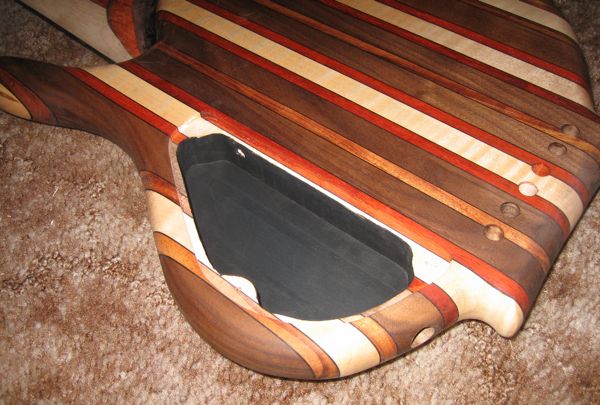
I also made the control cavity, but not the recessed part for the cover.
August 13, 2008
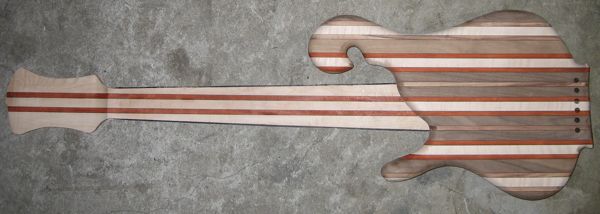
Although it looks like not a lot happened since last time, it did. Just not major things. The bridge, pickup and neck pockets have all been made to the right sizes and fit them perfectly.
The back of the neck is pretty much done and so are the side dot markers.
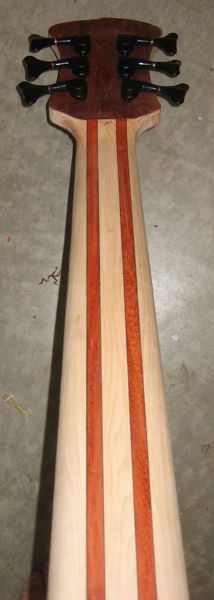
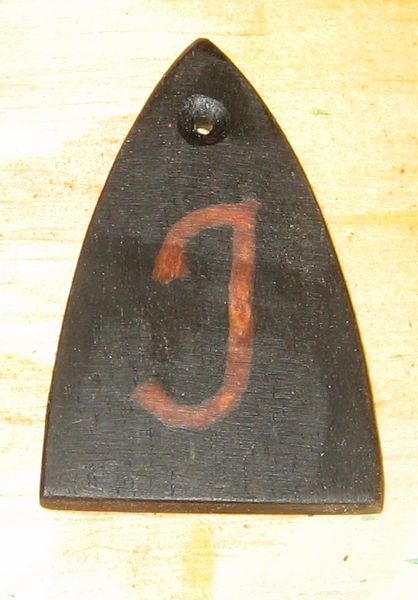
I also made the truss rod cover with my logo “J” of padauk on it.
I made the lip that the control cavity cover will sit in.
Just a shot of the back.
August 17, 2008
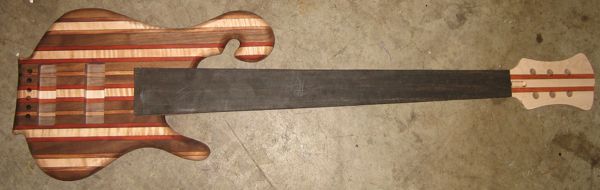
I glued the neck in a few days ago. It is nice and solid with a perfect fit.
Now I can start shaping the transition between the body and neck.
I also painted the control cavity with shielding paint.
August 26, 2008
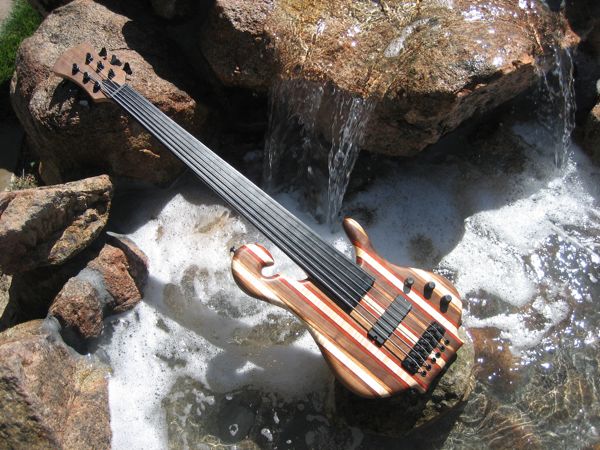
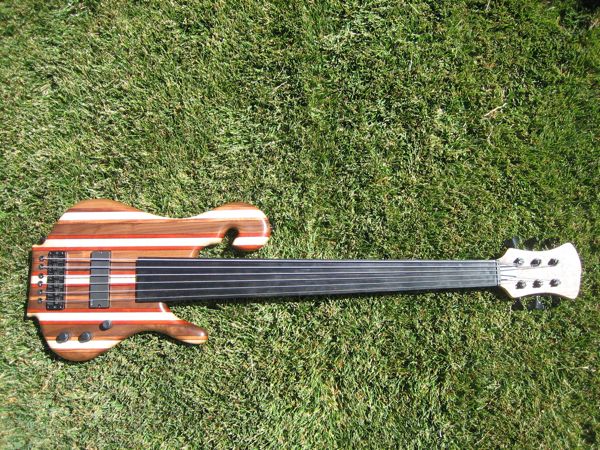
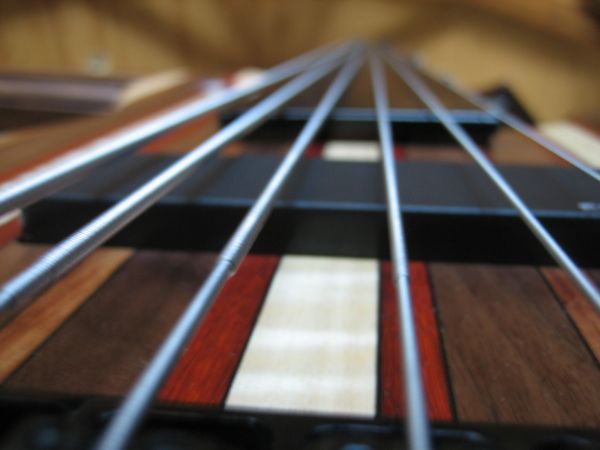
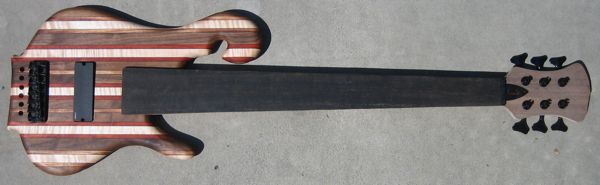
Well The bass is officially done!! I just need to take some professional pictures of it. In the mean time, here is a little video to hold you over.
August 27, 2008
On to the pictures!